http://www.printfriendly.com. No Fear Cooking

Sunday, April 6, 2014

Mr. Potato Head’s Greatest Gift


The Lays commercial with Mrs. Potato Head eating a bag of chips is such a decadent and nostalgic visual. Fried potatoes are a staple in the South. It goes with brown beans and cornbread, baked ham, breakfast, and on burritos.

I recently made breakfast burritos for my girls and of course I had to make fried potatoes. They can be a little tricky to make so I’m going to give you some of my helpful pointers.

The way you cut them designates the name. Home fries, which Beth prefers, are cut into cubes. Fried potatoes are sliced. Hash browns are grated. 

First you’ll want to peel the potato. My favorite type of French fry is with the skin on, but I’ve not ever left skins on for fried potatoes. It just doesn’t seem right. 

The way my mom cut a potato is she started out cutting it in half down the middle. 

Then cutting the half in half, making quarters.

With the quartered halves pushed together, start slicing thinly. 

You could make it thicker if you like thicker fried potatoes, but I was making this for burritos and we like it thin.

Chop the remaining half the same way.

Depending on your size of potato, in general, one potato will serve two people. SInce I prefer to buy the large baking potatoes and we were using this for burritos, I used only one potato for four people. Just a suggestion for serving amount.

What you use to fry it in is your choice: a pan with a lid or an electric skillet. When I was young I didn’t see the need for an electric skillet. The more experienced I became at cooking I realized the even cooking was ideal for frying or making gravy. 

Next you’ll want to use some flavored grease. For you newbies that means grease left over from cooking bacon or sausage. For you health fanatics who haven’t had a drop of grease on your fit tongues in decades, cover your eyes. I’m going to suggest you keep a jar or can of flavored grease.

This is mine:

 Every time you cook bacon or sausage and don’t use the grease, pour off the grease in this jar or can. It doesn’t matter if the bacon grease mingles with the sausage grease. It’s mighty handy to have when you want to make gravy (or fried potatoes) and you haven’t cooked any greasy meats beforehand. In any case, if you don’t have any flavored grease you can use lard or oil. You’re not going to be using much anyway.

I barely covered the bottom of my electric skillet with flavored grease. 

I turned the heat to about 350 or medium on the stove if you’re using a pan.

Let this heat for about a minute. You want the grease hot. Make sure the potatoes are cut before you heat the grease or the grease will burn.

Shove all the potatoes in the hot grease and stir them around so all sides are coated. 

Now it’s time to season. Add salt, pepper and garlic salt. Don’t forget the garlic salt. 

Put a lid on it and wait about 3 or 4 minutes. It’s ideal to have a clear lid so you can check the progress without lifting the lid and releasing the steam. The potatoes are best when steamed and it cuts down on cooking time. 

I had a hard time cooking fried potatoes at first because I wanted to flip them too early and too much. What will happen is they will get mushy and fall apart. Resist the temptation!

Using a spatula flip them over and judge how they look. 

If it looks barely browned you know you need to cook it longer than 3 or 4 minutes. If it looks pretty crispy when you flip you know you need to cut down the cooking time for this side. 
It’s up to you if you like your potatoes crispy or soft as to the next step. I like to keep the lid on for the remainder of the cooking because I like my fried potatoes more soft than crunchy.


I took the lid off after a minute or two because Beth likes it crispy.

I like to drain my potatoes on paper towels. I line whatever bowl I’m using with paper towels before putting the cooked goodness in it.

If the potatoes get finished before the rest of your meal is ready, slap some foil over the bowl and they should stay warm enough until ready to serve. Or you can heat it in the microwave for about 30 seconds.

If I every have any leftover I put it in a ziploc for a quick morning burrito of eggs, potato and cheese. 

That’s my fried potato story and I’m sticking to it.

Let me know what you think and how it turned out.

Happy Cooking!


Fried Potatoes

1 Potato
Flavored Grease (or lard or oil)
Salt, Pepper, Garlic Salt

Peel your potato. One potato for two people, unless you’re using them for delicious breakfast burrito, and then one large baking potato will work for 4 people.

Cut the potato in half. Half the half (or quarter the half). Slice up starting at the flat end you just cut, ending at the round at the end of the potato. Continue the same cutting with the other half of the potato.

If you have some bacon or sausage grease (flavored) use it; if not, lard or oil will work.

Heat a large skillet, or electric skillet, to medium (or 350) with just enough grease in the the skillet to coat the bottom. After a minute or two add the potatoes. Using a spatula swish the potatoes around until they’re coating with oil. With the potatoes as evenly spread on the bottom, season with salt, pepper and garlic salt. Put a lid on the skillet.

DO NOT STIR for the next 3-5 minutes, depending on how many slices are in the skillet.  

Carefully lift the lid, avoiding splatter, and flip the potatoes over so the browned ones are on top. Put the lid back on the skillet.

Judge the next timed section by how the potatoes looked when you flipped them. If they looked too brown for your test, don’t cook 3-5 minutes. If they didn’t look brown enough, cook longer than 3-5 minutes.

Place the cooked potatoes in a bowl lined with paper towels. Cover with foil to keep warm for about 15 minutes, or you can warm them in the microwave for 20 seconds if the rest of the meal isn’t ready when the fried potatoes are.

Serves 2 as a side, 4 in a burrito

Saturday, April 5, 2014

Making Art out of Rubbish


I wouldn’t exactly call what you find in your pantry or fridge “rubbish,” but you know what I mean.

I’ve found myself with time on my hands since Miles has decided to go to grad school. I stand in front of an open refrigerator door, starring at it’s contents. I mosey over to the pantry and gaze the different shelves, trying to make something come together. Serendipity comes when planning a late meal for him.

I had a handful of shrimp left over from making jambalaya the other day and I knew it would be just enough to make one meal. I decided shrimp Alfredo fettucinni would be just right for Miles, but then what was I going to do with the remaining Alfredo sauce.

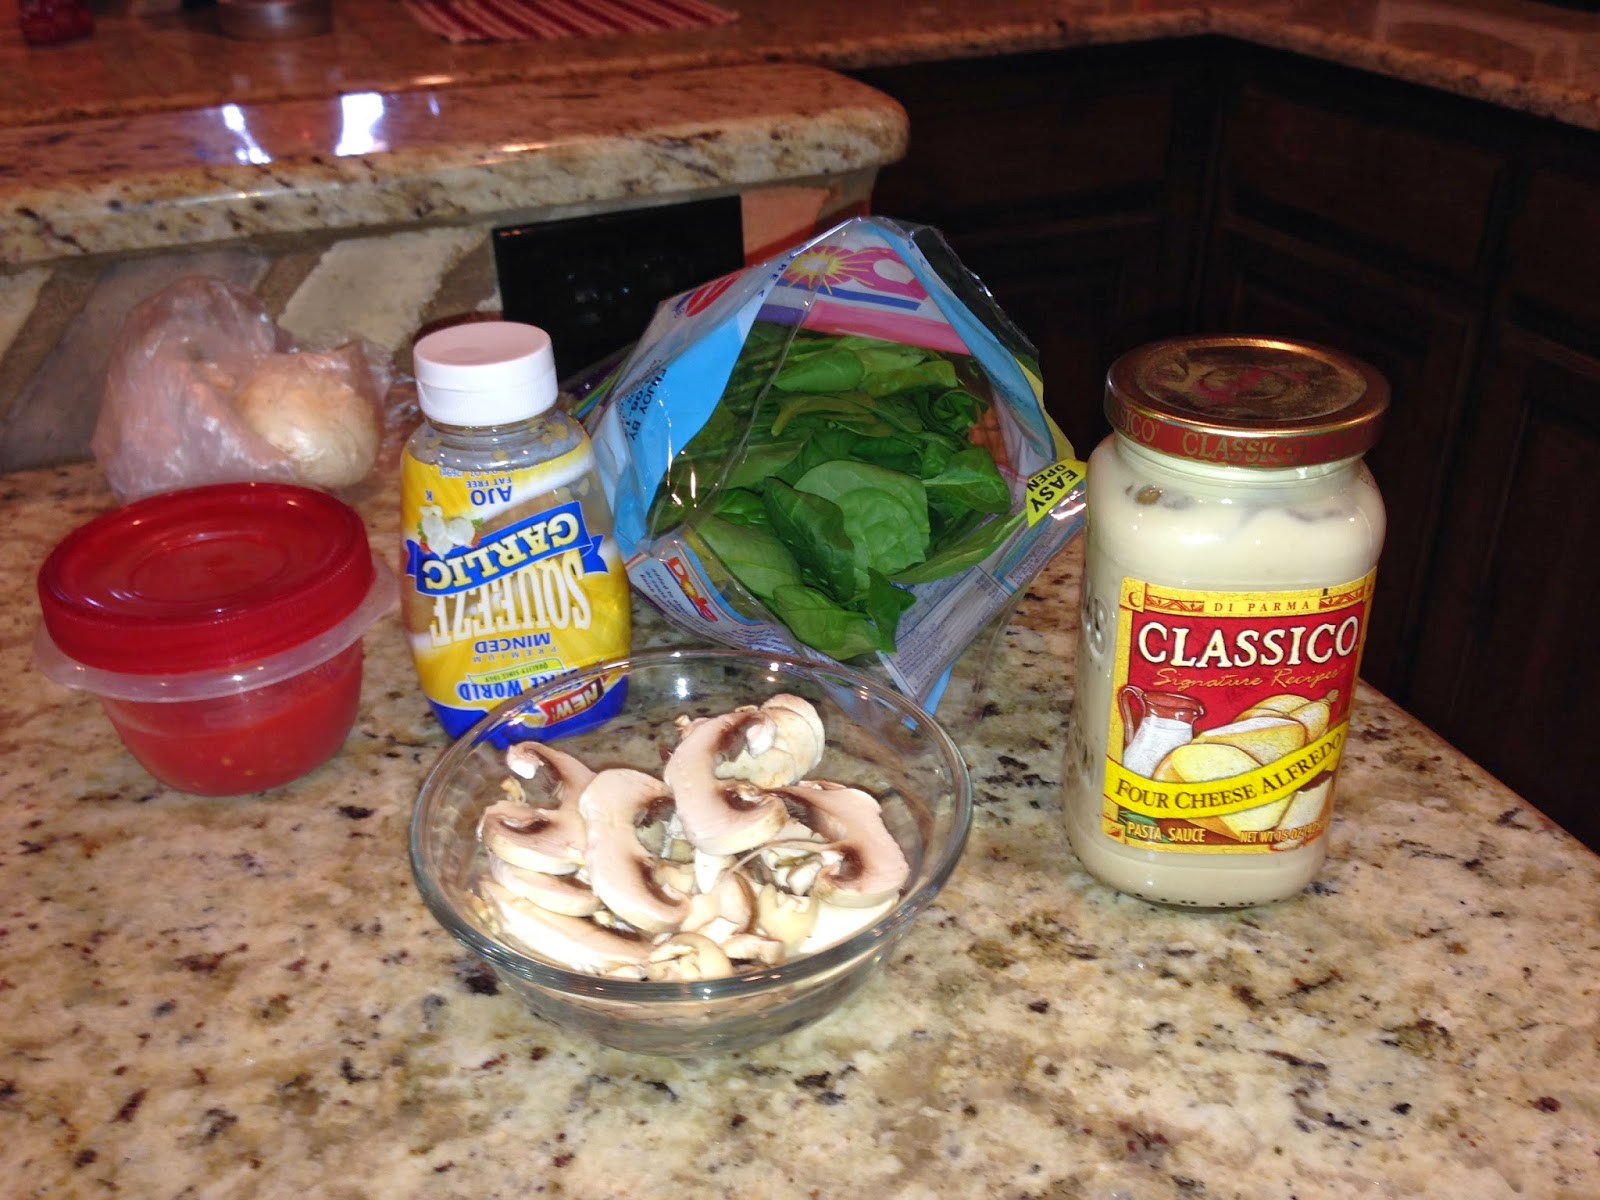
Looking in the fridge I spied fresh spinach, about a half cup of diced tomatoes, and a couple of mushrooms. Not knowing what all this meant I scoured the pantry. I’m one of those take-it-or-leave-it girls when it comes to meat. I didn’t think I’d be adding meat to this concoction but I knew just pasta wasn’t going to be enough. After pushing around some jars and bags, I found a lost package of cheese tortellini. It had probably been waiting for me for months, because apparently I had forgotten I purchased it. Tortellini would be sufficient for this dish.


I started a pan of boiling water to cook the tortellini. It takes about 12 minutes to cook so  I waited until the water boiled and I added the tortellini to start the next steps.


In a small skillet, because this was just going to be for me, I added less than a teaspoon of Olive Oil and turned the heat to medium. While the pan warmed I got out my minced garlic and began cleaning and slicing the mushrooms.

I cooked the garlic in the oil for less than a minute then added the mushrooms. Once I stirred this around and got the mushrooms all covered in oil I added salt and pepper.


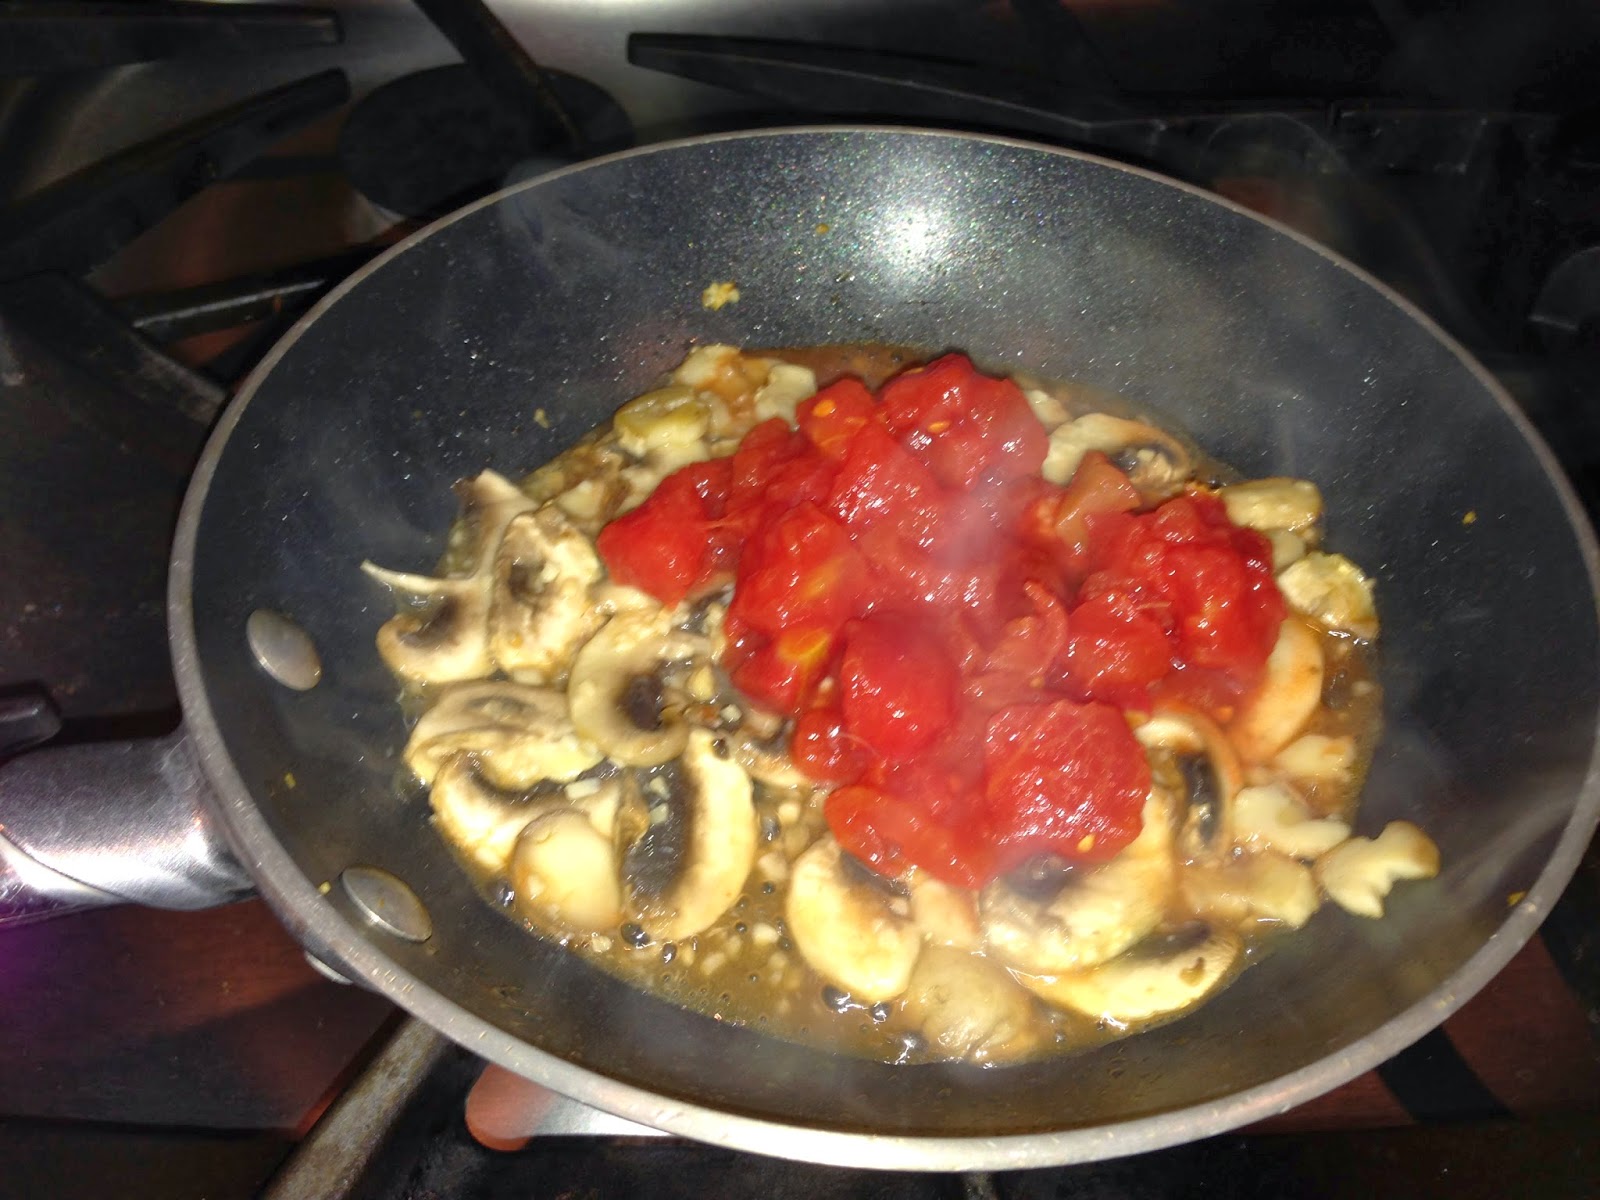
After a minute or two and before the mushrooms were completely sauteed, I added the tomatoes. I pushed the tomatoes to the bottom so the would get heated. 

Then, using a wooden spoon, I mashed the diced tomatoes until they weren’t so chunky. By now the mushrooms were cooked and the garlic and tomatoes were mixed. 

I took large handfuls of spinach and put that on top. 

It looks like too much spinach, but it takes a lot of fresh spinach because it will wilt down considerably. I let it rest for a minute, waiting for the heat of the pan to start wilting the spinach. 

Slowly I scooped the mushrooms and tomatoes from the bottom and added it to the top of the spinach, slowly working the spinach down to the bottom.
When the spinach had completely wilted, 

I added half a jar of Classico Four Cheese Alfredo sauce. There is no shame in jars and cans.

While I let this heat for another minute or two, I drained the tortellini.

Finally I added the cooked tortellini and mixed well. I must say it was delicious and easy.         


Any kind of leftover meat would be good in this, or even pan frying some Eckrich smoked sausage. You could add any number of vegetables and remove what you don’t like. Mozzarella or swiss cheese could be added. Even some heat from a jalalpeno or dried red peppers would be good.

Look around the kitchen and see what goes together. You never know what art you can create.

Give this a try and tell me what you think.

Happy Cooking!


Alfredo Tortellini

Tsp Olive Oil
1/4 Tsp Garlic, minced
2 Mushrooms, sliced
1/4 C Tomatoes, diced
1/2 Baby Spinach bag
1/2 Jar Classico Alfredo Sauce(any kind)
1/2 Cheese Tortellini  bag

In a boiling pot of water, add tortellini and cook as directed.

Once tortellini is added to water, add oil to a small saucepan and turn the heat on medium. 

While the pan and oil heats, clean and slice mushrooms. Add the garlic to the oil and after a couple of passes around the oil with a wooden spoon, add mushrooms. Stir around to cover the mushrooms with oil and add some salt and pepper. Saute for a few minutes.

Add the diced tomatoes and cook until heated through.

Add the spinach and cook until wilted.

Add the Alfredo sauce and heat for a few minutes. 

Add cooked tortellini and mix well.


Monday, October 28, 2013

Brown Bean Seasoning

I never thought it would come to this, but my back was against the wall. Actually, I just ran out of my favorite brown bean seasoning and was too lazy to go to the grocery store to get more. I despise going to the grocery store-too many people. My fantasy is to cook and just have the groceries to magically appear. Things seldom go my way.

With the little dried up pinto beans sitting in my crockpot waiting to be seasoned and cooked, I decided to see if there were seasoning recipes online. Of course there were. Not as many as I expected, but I found one that would work. It came from Carl Oberlender from The Tasty Kitchen: A Happy Recipe Community. I don't know how happy they really are but I was very pleased with his version, with a subtle tweaking of my own.

The bonus is most of these ingredients should be on your spice rack, or drawer, or shelf or wherever you keep yours. One or two may not, but they would come in handy in several other dishes so it would be a good investment, not just for this recipe. It's getting cold and a hot pot of beans is always a welcome addition to a good meal.

Here's the list:

Kosher salt, cumin, chili powder, garlic powder, onion powder, paprika, and Cajun seasoning. Mr. Oberlender added sugar and I omitted that and added the Cajun seasoning. My hand has trouble adding sugar to dishes that are not dessert. Some might call that a handicap, I call it sensibility. Please don't confuse the powders with the salts. Garlic powder is not the same as garlic salt. You don't want your family or guests puckering when they get that first spoonful of beans. It will be too salty.

Don't think you can't just add plain old salt to your bean, because you can. But a little bit of flavor won't hurt those magical fruits! I even season canned beans because they are so sad from being stuck inside an aluminum can for so long.

I kept my empty bottle of Bolner's Fiesta Pinto Bean Seasoning. I have great forethought like that.

I used a funnel to pour it all through.

Try this and tell me what you think. You might have something to add to this to make it even better! I'd love to hear it.

Happy Cooking!

Pinto Bean Seasoning

6 Tsp Kosher Salt
3 Tbsp Cumin
2 Tbsp Chili powder
2 Tbsp Garlic powder
2 Tbsp Paprika
2 Tbsp Onion powder
2 Tbsp Cajun seasoning

Combine all seasonings in an airtight container, like a used spice cannister. Use 2 tablespoons of seasonings per pound of beans. Seasoning can be stored for up to 6 months.

Sunday, October 27, 2013

Huevos Domingo


Because Sunday is our day to make breakfast, we have been trying to make something different than the usual scrambled eggs. Miles and I both love fried and poached eggs, but week after week the same moves get stale.

We decided on omelets this week. 

I hesitate to even admit that I made this dish. My dad has been making omelets for most of my life. Don’t think I’m going to quantify that statement and incriminate myself. “Not gonna do it.”- George Bush, AKA Dana Carvey on SNL. Let’s just say my dad is the Emeril of omelets; I cook in awe.

I did learn a few tricks from him. It all depends on how you like your eggs.

When my dad makes omelets for the entire family, he has bowls of everything imaginable: sausage, bacon, ham, cheese, green onions, white onions, chives, sauteed mushrooms, cheese, jalapenos, fried potatoes, tomatoes, salsa, and anything else he and Pam might come up with. You will want to have all the ingredients you want ready.

Whip 2 or 3 eggs in a bowl. Two sounds about right, but for some unknown reason 3 eggs makes a better omelet. I guess the extra egg compensates for all the filler.

Heat a small 10 inch, Teflon pan on medium high coated with Pam or a pat of butter. I prefer to spray Pam but my dad uses butter.

Let the pan get hot, about a minute or so. Pour the beaten eggs in the hot pan. It should  bubble when you pour it in the pan. 

I like to add salt and pepper at this point.

You want the egg portion you can see to get mostly done without burning the bottom of the eggs you can’t see. Personally, I’m not offended by a little running egg in the middle, but I know some people, (Joel and Miles) who act like a nuclear bomb has been set off inside their mouths. So, I like to run my spatula around the perimeter of the omelet to loosen the cooked part, while allowing the running part to run around the edge and get cooked. It helps to tilt the pan as you do this. 

Next it’s time to add your filling. You choose what you like. Today we ate closer to lunch than earlier to breakfast, so I grabbed some odds and ends out of the fridge that I had on hand: tomatoes, asparagus, mushrooms, and a few bites of left over steak and stir fried them beforehand.

You want to add your filler like you would a burrito, leaving room to fold.

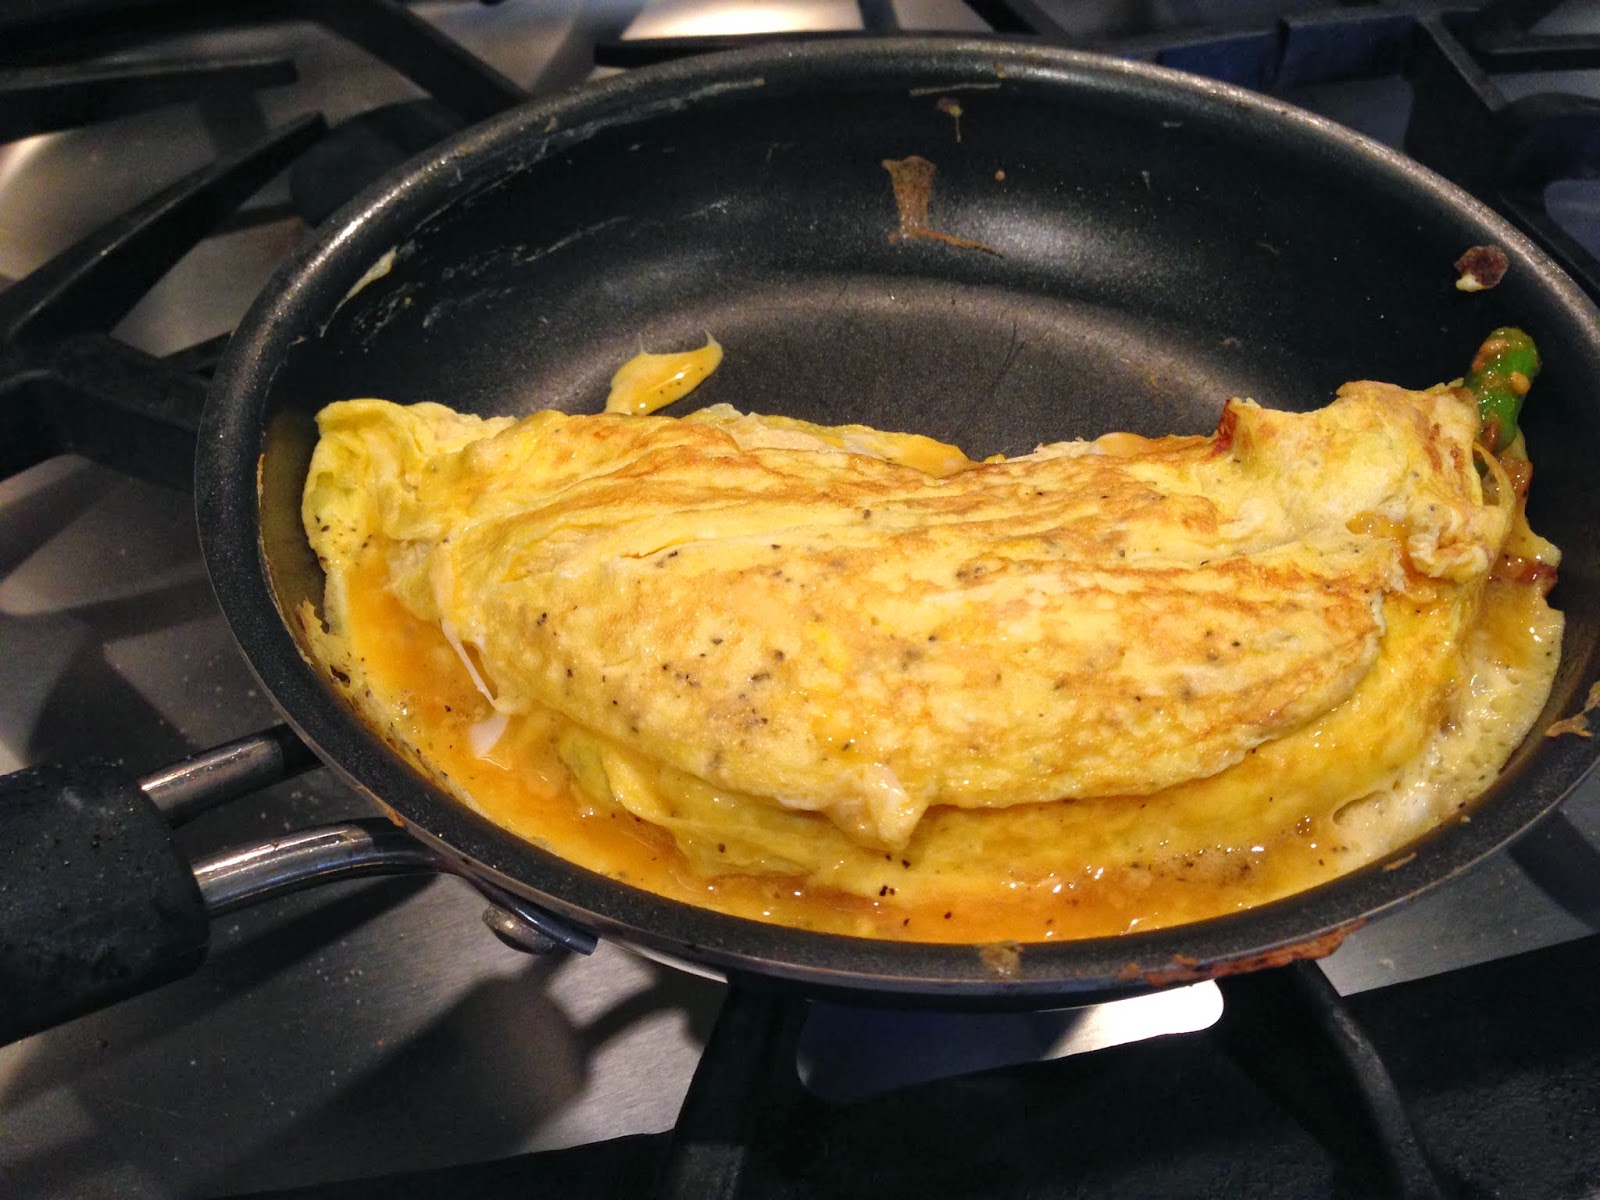
Now’s the part that is easier than you think it is. Using a wide spatula, take the half of the eggs opposite of where you put the filler and lift it and fold it over. 

Don’t get your feelings hurt if you don’t make a perfect fold. It’s ok, you’re not on the Food Network and I can just about bet the people who are going to eat your wonderful creation are not going to send it back to the kitchen for something prettier.

Let this sit for about 30 seconds. Then flip the entire folded omelet while tilting the pan. Again, don’t worry if pieces break off or you get messy. 

My cool dad can flip it with just the pan, but unless you’re feeling especially confident or you got your sassy pants on, I would suggest using the spatula, at least until you’ve made a few. But you can be the judge.

Again, another 30 seconds of cooking and it’s all over except the eating.

Sometimes I make hashbrowns on the side or MIles will make him some waffles, but usually the omelet is a filling meal in itself.

Try this and tell me how it went. Don’t be afraid to make it. It really isn’t as hard as you think it is. And the most wonderful part is you can make it anyway you’d like!

Happy cooking!

Omelets

3 eggs, beaten
Pam spray 
Filler-meat, vegetables, cheese, etc.

Heat a 10” Teflon skillet on medium high. Add the eggs and some salt and pepper.

Let this cook until most of the looks done.

On half of the eggs put all your filler. Using a wide spatula, flip the egg half over the filled half. Cook for about 30 seconds and flip the whole thing over and cook for about 30 seconds.

Monday, October 7, 2013

Old School Potato Soup


I might have mentioned before that my maternal grandmother was quirky, but then most things on my mother's side of the family was. One of Granny's favorite stories she liked to tell after I was grown was about when I was very little, and one day  we were making our way to the park only a block from her house,  when a car decided to ignore pedestrians in the crosswalk. She would wrinkle up her nose and mimic my childlike pitch, "Too Aaa! Too Aaa!" My mother had a penchant for using sailor words at other drivers, and apparently one of those phrases must have been "Stupid Ass." Granny pieced it together using the appropriate timing of my usage of the phrase and her inherent knowledge of her daughter.

Besides treating me like a little princess when I had the pleasure of staying the night with her without my pesky brother, Granny would let me request a meal, unlike the Nazi state I lived in under the rule of my mother. Mom never asked; she told. So when Granny allowed me the opportunity to select from some of her more delectable dishes, I often chose Potato Soup. 


Granny continued making me my favorite dishes until her arthritis got too bad for her to hold a knife to slice and chop. She would say, "Old Arthur has me today." I used to worry about that because Granny had been a widow for all of my life.

Hers is an easy recipe for a hesitant cook, but so delicious on a cool fall day.

Dice some onions. It doesn't take too many. It's mostly for flavor and you're going to boil them into oblivion.

Peel and cut potatoes in to whatever size you think you'd like. I don't make mine tiny nor do I leave boulders. Kind of a medium cut. In the picture it shows a mason jar of potatoes because my dad and Pam are gracious and thoughtful enough to can potatoes and give them to family, and it makes preparing this dish so easy. 

Boil the chopped onions and potatoes in water until the potatoes are soft, but not mushy, about 40 minutes. You'll want a medium size pot and the fire needs to be high enough to keep the water boiling but not high enough to make huge rolls. You want the potatoes covered in water at all times, so add plenty of water at the beginning.

Pour this in a colander to get rid of all the water. While that's draining, add a chunk of butter to the pot.

Return the cooked potatoes and onion to the pot and season with salt and pepper. Add enough milk to the pot according to how soupy you like it. I usually add extra because I like the buttery milky liquid. It's funny, I abhor cold milk but warm milk in soup is a palatal delight. Don't judge my taste buds.

Keep the fire really low because you want to heat the milk but not boil it. You might want to hang out nearby and give it a stir every once in a while. Heat until warm enough to melt cheese. Use a spoon to taste how hot it is.

This is my favorite part of potato soup: crumble saltine crackers in a bowl and add a heaping mound of shredded cheddar cheese.

Using a ladle, pour the soup on top of the crackers and cheese. Add your preferred balance of potato and liquid to your bowl. More salt and pepper as desired. And voila! Old school potato soup!

There are hundreds of potato soup recipes online, those with the addition of carrots and celery and bacon and cream cheese and flour and so much more. This is a basic recipe so start here first. Get the hang of the fundamentals. Then the next time you make it, change it and add what you think would enhance it.

The pictures of potato soup on the Internet look very tempting with their colors of orange and green, but I simply can't change the original recipe; it's what I grew up with and it's what I crave when the weather turns frosty.

As always, drop me line and tell me what you think.

Happy Cooking!

Potato Soup

Potatoes, chopped
Onion, chopped
Butter 
Milk

Peel baking potatoes-1 per two people. Chop into bite-sized pieces.

Chop about 1/2 small onion per 2 potatoes.

Place chopped potatoes and onion in a medium or large pot, depending on how much you're making. Cover with about 3-4 inches of water. Turn heat on high until a rolling boil begins. Stir, lower heat to low, put a lid on top and cock the lid to let the steam escape.

After about 30-45 minutes, drain the potatoes and onion in a colander. Return to pot.

Add a tablespoon of butter per potato to the pot and salt and pepper. Fill the pot with about as much milk as you like in proportion to the ingredients.

Keeping the heat on low, warm just until it begins to boil, stirring occasionally, about 10-15 minutes.

Serve in a bowl over crumbled saltine crackers and shredded cheddar


Sunday, October 6, 2013

Fiesta Corn Dip-Arrrrrrrrrriiibbbbbaaaaaaa!!!!


Yesterday was Cinco de Octubre so I celebrated by having a Mexican buffet. The 5th of October has no relevancy in Mexican history as far as I can tell, but it was a Saturday and people were coming over for lunch and I love making, serving and eating Mexican food. So there you have it.

I just have to include this right now, even though it has nothing to do with the dip recipe I’m writing about. I found this taco seasoning online and it truly is so much better than any package kind. I think I have now shunned all packaged taco seasoning because this was the perfect blend of spices. I found it on The Girl Who Ate Everything blog. Here’s the link if you want to give it a whirl: http://www.the-girl-who-ate-everything.com/2012/09/homemade-taco-seasoning.html You can thank me later.

If you get bored with salsa, guacamole and chili con queso as dips like I do, Fiesta Corn Dip is a nice diversion. Don’t get me wrong, I still made the aforementioned dips, but I had a crowd and wanted to test a new recipe, something to add to the repertoire. I have an insatiable desire to test new recipes on trusted friends and family. A lot like scientists use white lab mice.

The recipe I found was on Taste of Home. Of course I altered it. 

The original recipe called for a can of whole kernel corn and a can of Mexicorn, which the label is now politically corrected to Fiesta Corn. It’s the corn with bits of green and red bell pepper in it. I was only making half the recipe so I chose to go with straight Fiesta Corn

Drain the corn and put in a medium size bowl. Add a cup of shredded cheddar cheese and about 1/4 cup of shredded pepper Jack cheese. I omitted the chopped green onions, but you could add them.

Next add a can of chopped green chilies. I use the hot Hatch brand. “I also like to live dangerously.”-Austin Powers.

Add one chopped jalapeno. I don’t seed mine but you could. Mix all this together.

To this crazy corn mixture add 1/4 cup mayo and 1/2 cup of sour cream. The original recipe also called for 1/8 teaspoon of sugar, but I couldn’t make my hand follow that particular order. Sugar and corn? Couldn’t do it. Cover and refrigerate overnight.

The comment section on the Taste of Home site had tips for adding additional ingredients and even heating it. I preferred the taste of cold corn for a dip. I’m thinking this recipe will be a new standby when making dips. It has a nice little kick to it, but not too much for the more delicate palates. Red pepper flakes would be a way to inch up the heat or even some jalapeno salt.

Try this and tell me what you think. I’d love to know how you changed it or if you liked it at all.

Happy Cooking!

Fiesta Corn Dip

1 can Fiesta Corn( or 1/2 can plus 1/2 can regular corn)
1 Cup shredded cheddar cheese
1/4 Cup shredded pepper Jack cheese
1 can chopped green chilies
1 jalapeno, chopped
1/4 Cup Mayo
1/2 Cup sour cream

Drain the corn and add to a medium size bowl. Add the cheeses, green chilies and jalapeno. Mix. Add the mayo and sour cream. Cover and refrigerate overnight. Serves 4-5.